Hook
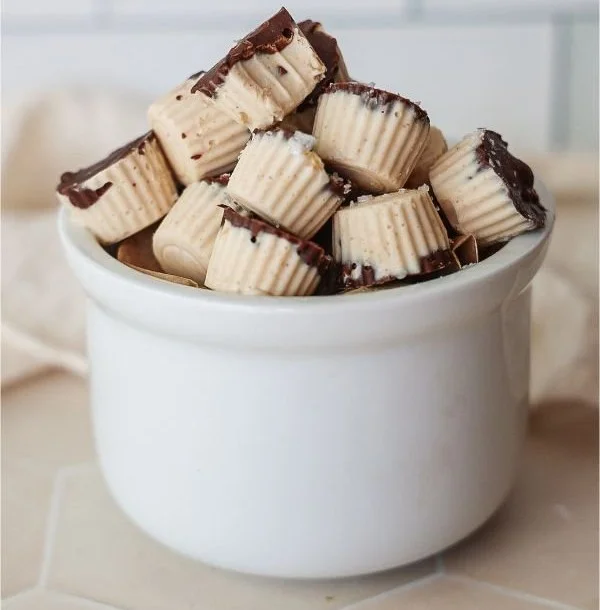
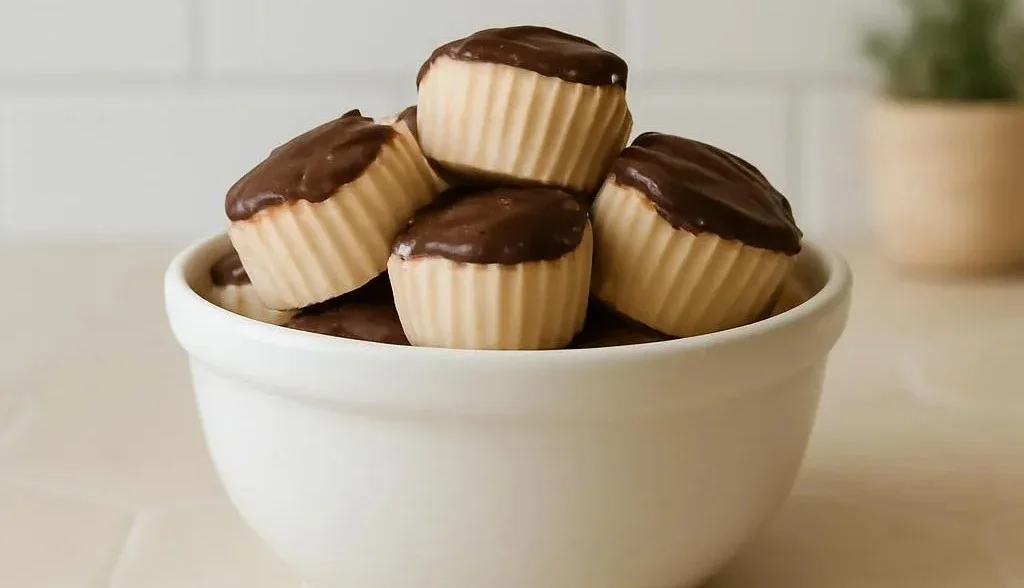
Bright, simple, and perfectly snackable — these frozen yogurt bites are sweet, tangy, and just the right kind of cold on a summer afternoon. The chocolate sets with a satisfying snap while the yogurt center stays creamy and slightly pillowy as it thaw opens.
RECIPE SNAPSHOT
Time: prep 10 min, cook 0 min, total 240 min (includes freeze time)
Yield: about 20–24 bites (depends on mold)
Skill level: easy
Best for: afternoon snacks, lunchbox treats, light dessert
Key flavors: chocolate, vanilla, maple
H2: A little story about this dish
I started making these on a sweaty July weekend when my freezer felt like a little refuge and I wanted something chocolatey but not too heavy. The kitchen smelled faintly of toasted coconut oil and warm vanilla as the chocolate melted, and my kids loved the little “snap” when they bit into one. If you like tiny, portable frozen treats, they’ll become your go-to, much like the flaky sponge I admire in a silky genoise technique I often visit for celebration cakes.
H2: Why you’ll love it
These bites are unfussy — no special equipment beyond a mold, a microwave or double-boiler, and a freezer. The yogurt mixture stays luxuriously thick and creamy because you start with thick Greek or coconut yogurt, so you don’t get icy crystals when they thaw a little. The chocolate shell gives a satisfying contrast: glossy as you pour it, then mattes and crisps as it freezes, and the first bite is both crunchy and pillowy.
H2: How to make Easy Frozen Yogurt Bites (Dairy-free option)
Step-by-step guide
Start by whisking the yogurt, nut butter, maple syrup, optional protein, vanilla, and salt until the mixture smells bright with vanilla and has a texture like very thick frosting. Scoop or pipe the mixture into your mold about two-thirds full so there’s room for the chocolate cap; if the surface looks spa-like and smooth with soft peaks, you’re on the right track. Melt the chocolate with coconut oil until glossy and pourable, spoon a little over each filled crevice, then freeze; a good visual doneness cue is when the chocolate turns from glossy to a matte, firm surface and the yogurt inside no longer jiggles when you nudge the mold. For technique notes borrowed from other chilled desserts, I sometimes think about how a light cafe mousse sets — gentle, cold, and delicate.
H2: Ingredients
1 cup THICK greek yogurt or coconut yogurt (*see notes), 3 tbsp cashew butter or almond butter (*see notes for subs), 3 tbsp maple syrup (*You can add another tbsp if needed.), 3 tbsp of your favorite protein powder (*totally optional! Don’t use if you don’t love your protein powder.), 1 tsp vanilla extract, gooooood pinch of sea salt (*I love maldon or celtic salt), handful of cacao nibs (*optional. Can always add in other mix-ins! But cacao nibs are packed with antioxidants), 3/4 cup chocolate chips or chopped chocolate, 1/2 tbsp coconut oil
H2: Directions
Mix together the frozen yogurt mixture: Combine the yogurt, nut butter, sweetener, optional protein, sea salt, and vanilla in a large bowl. Whisk together until smooth, thick, and creamy. Taste the mixture & adjust as needed., Divide it amongst your mold: Divide the yogurt mixture amongst your mold, filling each crevice about 2/3 way full., Melt the chocolate: In a small bowl, add the coconut oil and chocolate. You can melt the chocolate using the double-boiler method or in the microwave. Microwave in 30 second increments, stirring well between each, until completely smooth. Add a little chocolate to the top of each bite, filling that last 1/3 of each crevice., Freeze! You’ll want to freeze the bites for 3-4 hours before removing them from the molds. Store in an air-tight container in the freezer for up to two months. Let the bites thaw a few minutes before enjoying for the creamiest texture.
H2: How to serve and store it
The best way to enjoy Easy Frozen Yogurt Bites (Dairy-free option)
Serve them straight from the freezer for a crisp chocolate shell and a cool, yielding center, or let them sit at room temperature for 3–5 minutes for a softer, creamier bite. Store in an airtight container in the freezer for up to two months; I keep a stack of parchment sheets between layers so they don’t stick. If they get a little frosty, let them warm for a few minutes on the counter rather than microwaving — the gentle thaw keeps the texture smooth, similar to how I time a chilled mousse to soften before serving from the fridge.
H2: Tips and variations
Pro secrets for Easy Frozen Yogurt Bites (Dairy-free option)
- Use truly thick yogurt; if yours looks pourable, strain it in a fine sieve or a coffee filter for 30 minutes so the bites aren’t icy. 2) Don’t overheat the chocolate — stop when it’s mostly melted and stir it to glossy perfection; burnt chocolate tastes grainy and bitter. For variations: swap almond butter for cashew as called for, stir in the cacao nibs for crunch, or fold in tiny pieces of soft fruit right before filling for bursts of flavor. For more texture ideas and technique notes, I sometimes revisit a favorite sponge recipe for inspiration on how gentle folding and patient chilling change results (technique notes).
H2: Common questions
FAQs about Easy Frozen Yogurt Bites (Dairy-free option)
Q: Can I use regular (not thick) yogurt?
A: You can, but the centers may form ice crystals and be less creamy. Strain thin yogurt in a fine sieve for 30–60 minutes to thicken it before using.
Q: How long do they keep, and do they pick up freezer flavors?
A: Stored airtight, they keep up to two months. Use a sealed container and layered parchment to prevent them from absorbing other freezer odors.
Q: My chocolate isn’t smooth after melting — help!
A: Heat gently and in short bursts, stir thoroughly between bursts, and add the specified 1/2 tbsp coconut oil to help the chocolate become glossy and pourable. If it seizes, a teaspoon of warm liquid (not cold) can sometimes help, but gradual reheating usually fixes the issue.
Q: Can I make them without the nut butter?
A: You can omit it, but the nut butter adds richness and structure; skip it only if you’re adjusting sweetness or adding more protein powder to keep texture.
Q: Do I need a special mold?
A: No — silicone candy molds or mini muffin tins both work. If you use a metal tin, line it or use paper liners to help remove the bites cleanly and avoid chipping the chocolate.
Conclusion
If you want another version with a similar idea, check out this Easy Frozen Yogurt bItes (Dairy-free option) – Dani’s Healthy Eats for a slightly different spin. For a fully dairy-free guide focused on texture and flavor, this Dairy-Free Frozen Yogurt Bites post is a lovely companion. If you like cookie-dough style centers, try the inspiration from this Cookie Dough Frozen Yogurt Bites recipe. And for a darker chocolate-forward version, take a peek at this Dark Chocolate Frozen Yogurt Bites idea to spark more tweaks.
I’d love to hear how you customize yours — leave a note with your favorite mix-in.
Easy Frozen Yogurt Bites
Ingrédients
Method
- In a large bowl, whisk together the yogurt, nut butter, maple syrup, optional protein powder, vanilla, and sea salt until smooth, thick, and creamy.
- Adjust sweetness to taste as needed.
- Scoop or pipe the yogurt mixture into your mold, filling each crevice about 2/3 full.
- In a small bowl, combine the coconut oil and chocolate chips.
- Melt the chocolate in the microwave or using a double-boiler method, stirring until completely smooth.
- Pour a little melted chocolate over each filled mold, covering the yogurt mixture.
- Freeze the bites for 3-4 hours, or until the chocolate is firm and the yogurt is set.